
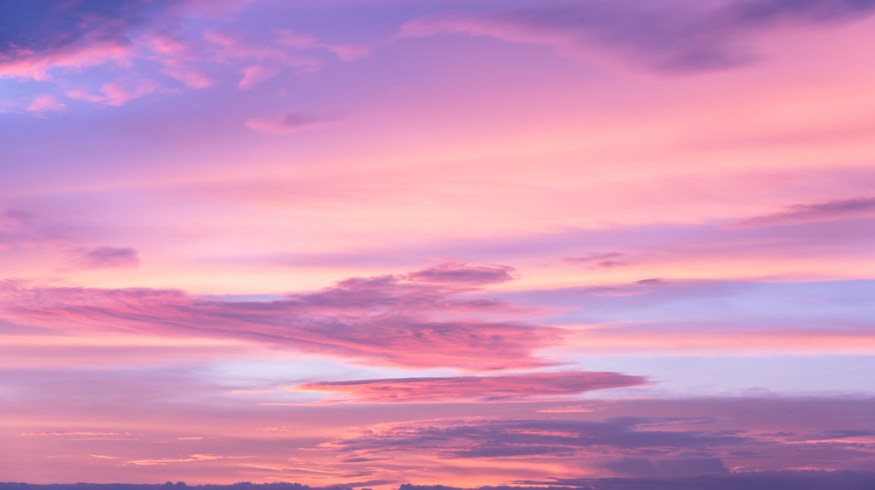
Color Grading Tips: The Ins and Outs of Correcting for a Pink Sky

There are many elements that you can change in post-production with a little forethought. In this case, the color of the sky.
A pink sky has become a predominant feature in many music videos. Is it a symbol of teenage freedom, late evening adventures, innocence of youth? I’m sure there are experts out there who could spend hours decoding the meaning and popularity behind the rise of pink skies in rap and alternative music videos. But perhaps it just comes down to Instagram influencers. Who knows?
Whatever the case, there’s no denying that a pink sky looks beautiful. However, due to the circumstances of capturing one, since setting up at golden hour doesn’t exactly guarantee that the sky will turn pink, many filmmakers will opt to recreate a pink sky digitally. Before continuing, if you were wondering why sometimes the sky turns red, orange, or pink at sunset, here’s a snippet from my Golden Hour tutorial.
When the sun is high in the sky from midday to late afternoon, there is very little interference from our atmosphere; the light is bright and the shadows are harsh. However, just after sunset or just before sunrise, the sun is just about level to the horizon, and the light has to travel through many miles of dense atmosphere before illuminating what we can see, which decreases the intensity of direct sunlight. The blue light emitting from the sun is caught up in the atmosphere leaving more red, yellow and orange to pass through, which gives the sun a nice warm golden glow. Very simply, golden hour is a short period just after sunrise and just before sunset.
This article isn’t necessarily a tutorial because, quite frankly, all you do is push the highlights slightly into the magenta region, but there are a few factors to consider. As with converting day-for-night, there are requirements to help you pull off the grade, and this is what I’ll be covering.
A Few Things First
1. You still need to still film at Golden Hour.
The scattering of the light will leave you with either a golden sky or a desaturated blue sky. Converting a saturated blue to pink will leave you with a very stylized result.
For example, in the following music video for “Bounce Back” by Big Sean, the grade is very stylized.
Based on the content of the music video, it’s evident that the filmmakers and the artist want you to notice the colors, as the video itself is very abstract. But we can see from the shots that they recorded a blue sky, and the pink grade appears unnatural. Again, in the context of this specific music video, it works, as that’s the intended result. But when aiming for a natural style, you want to film during the late evening.

2. You want to use soft light if filming with actors.
Subconsciously, we link a pink sky to a setting sun, which gives off soft light, and shadows are stretched. If your shot has a high contrast ratio, the pink sky may look slightly out of place. An excellent example of this is in Jaden Smith’s music video for “Icon.”
You can see the pink sky isn’t natural as there’s some color bleed in Jaden’s jewelry — I had to zoom in 200 percent to spot this — but the look is a lot more believable. A big part of this is that the filmmakers shot the video in the evening with soft light, and I can’t be certain, but I would even go so far as to guess that they shot this with natural evening light, due to the lack of light hotspots in the reflection of the car and Smith’s jewelry.
3. Not everything needs the pink cast.
Yes, there should be a subtle pink cast across all highlights, but you don’t want the same intensity as the correction for the sky. Using the three tips above, we’ll walk through the steps of converting an evening sky into a pink sky. This is my shot; it’s of a musician climbing over a country fence, and for this specific shot, we’re focusing on the clouds in the background and dropping the musician out of focus.

First, we’re going to add a second node along with a layer node. Select “node 01,” and for the time being, disable it (Ctrl+D). Your node tree should look like this. (Node 01 is for any base corrections I need to make after I have graded the sky.)

On node 02, we’ll introduce our pink sky. There are numerous ways you can do this and achieve similar results. You could ramp the magenta tint up to 100, apply a gradient to create a CSI Miami-inspired gradient sky, use the Hue vs. Hue curve, and so on. They will all yield similar results, but we’re just going to push the gain/highlights color wheel toward magenta.
The further you drive toward the edge of the color circle, the more defined the effect will be. But like a lot of things, less is more. And since I followed tips 1 and 2, introducing magenta into the highlights will, for the most part, only affect the areas of the image I want to adjust.
The sky looks great; we have a warm fall-off onto the grass, which is what you would expect with a Golden Hour cast. However, the musician’s white shirt looks like it has gone through the washing machine with a red sock.

We would expect his skin tones to become warmer and pinker, but we don’t want his top to become this colorized. To fix this, I will drop to the node underneath (04), and using the Custom Power Window Stencil, I’m going to draw around the short and give it a softness of 3.5. Of course, since the person in the frame is moving, I would then need to track this window too.
![]()
Then, using the gain wheel, I’m going to introduce the smallest amount of magenta, just so the vest isn’t wholly bypassing the new natural light.
This is the before:

And this is the after:


If necessary, you could also mask the grass and reduce the tint:

However, I do like the overall pinkness from the first finished grade, but ultimately these creative choices would be up to you.
Are you an Adobe Premiere Pro CC user? Then filmmaker and YouTuber Justin Odisho has you covered with a similar tutorial for that platform.
Cover image via wayfarerlife.
Looking for more on color grading? Check out these articles.


